Ok, the first design I’m going to try with Arty will be the most simple one that I can come up with. The idea is just to test the basic Vivado design flow.
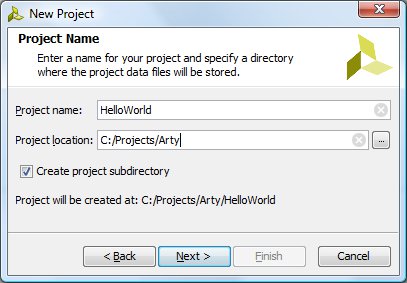
I’ll put my Arty projects under C:\Projects\Arty.
Creating the project
First let’s start Vivado and select Create New Project. There’s an easy to use wizard that will guide you through the needed setup steps. The project name will be HelloWorld.
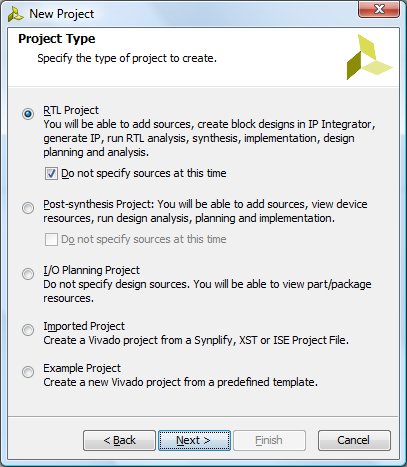
The project type will be “RTL project”.
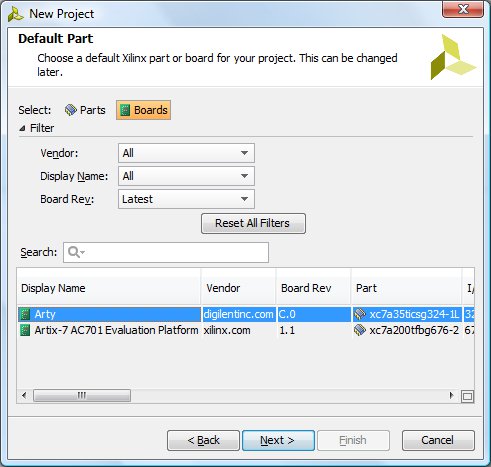
For the default part let’s choose the Arty board.
Here is the project summary showing the board and FPGA details.

Next I will need to describe my design. Let’s have a look at the Arty reference manual.
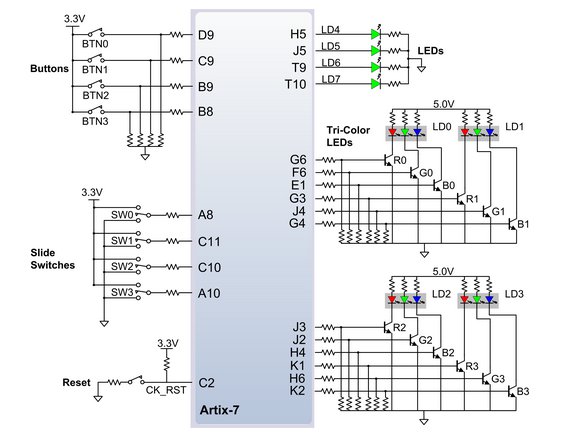
Hmm, looks like I could directly wire the push buttons BTN0-3 to the leds LD4-7. Shouldn’t be too complicated. 🙂
Adding sources
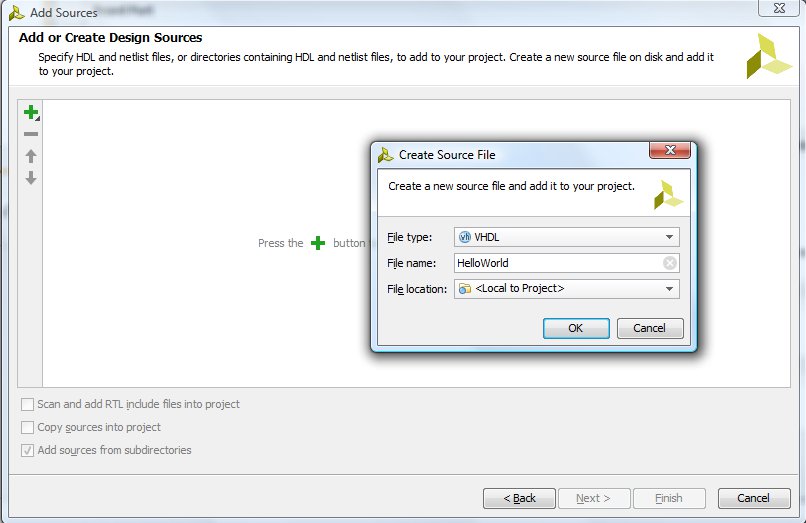
Let’s add the design source: in the Sources window right click “Design Sources” and select “Add Sources” and “Add or create design sources”. Click the plus-button and select: “Create File…”. I’ll select “VHDL” as the file type and the file name will be “HelloWorld”.
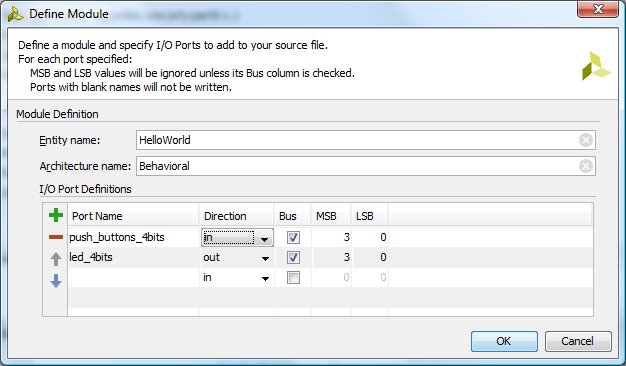
After clicking Finish a new window opens: “Define Module”. Let’s define an entity “HelloWorld” (and related architecture “Behavioral”) with one 4-bit input port (“push_buttons_4bits”) and one 4-bit output port (“led_4bits”).
Vivado will create one VHDL source file for us: C:\Projects\Arty\HelloWorld\HelloWorld.srcs\sources_1\new\HelloWorld.vhd. For my intended design I just need to connect the input port to the output port inside the architecture part.
library IEEE;
use IEEE.STD_LOGIC_1164.ALL;

entity HelloWorld is
   Port ( push_buttons_4bits : in STD_LOGIC_VECTOR (3 downto 0);
       led_4bits : out STD_LOGIC_VECTOR (3 downto 0));
end HelloWorld;

architecture Behavioral of HelloWorld is

begin
   led_4bits <= push_buttons_4bits;
end Behavioral;
Synthesizing the design
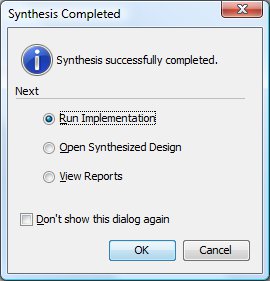
The next step is to synthesize our VHDL design description and create a netlist. Just click “Run Synthesis” in the Flow Navigator window. After the synthesis has finished Vivado prompts to run the implementation i.e. to map the netlist components to the Artix FPGA elements.
However, before that we need to specify the pins for each of our input and output ports.
Pin mapping
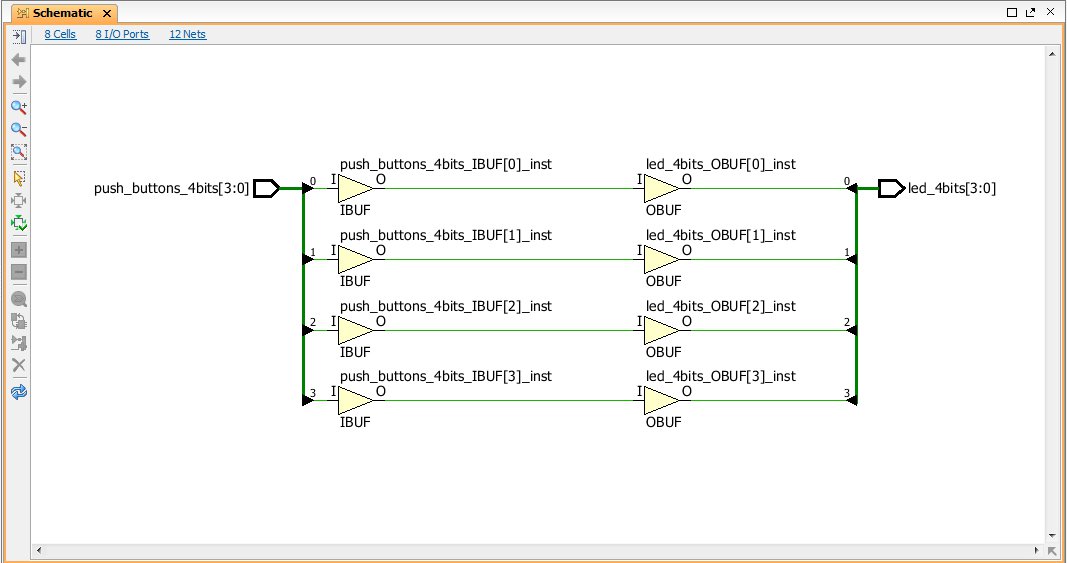
In the Flow Navigator under Synthesized Design click Schematic. This will show our synthesized design which consists of 4 input buffers and 4 output buffers (as expected).
Right click the input port and select “I/O Port Bus Properties…”. In the properties window select the I/O Ports tab. For each port we need to specify the site (the pin name) and the I/O standard. We can get that information from the part0_pins.xml file that was part the the board package (the pin names were also marked in the component schematic shown earlier).

The input port push_buttons_4bits properties should look like this:

Do the same for the output port led_4bits. The updated properties are shown below:
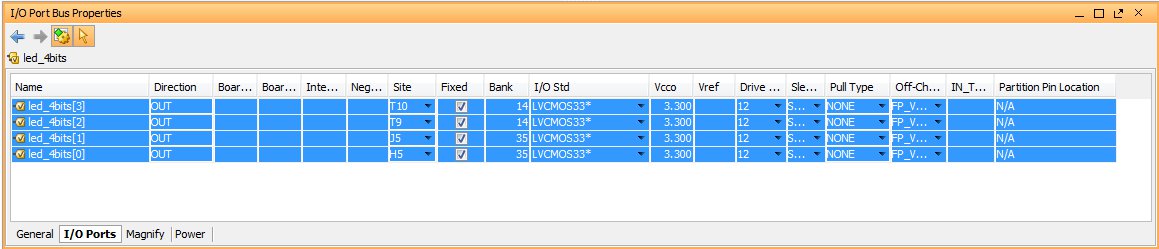
So now we have locked (constrained) the input and output ports to the correct pins.
Implementation
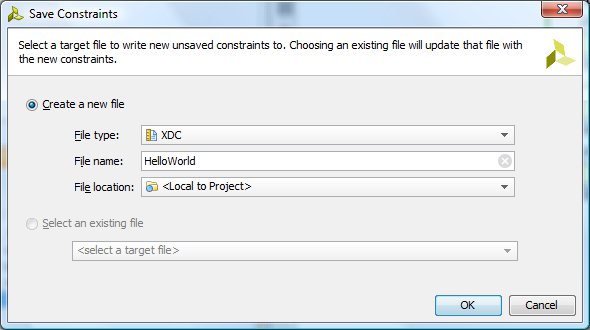
Click “Run Implementation” in the Flow Navigator. Vivado will ask to save the pin constraints. Let’s do that.

Name the constraint file HelloWorld (file type is XDC). The constraint file is just an ordinary text file. It can be opened from the Sources window.
Synthesis will be re-run and then the implementation will start.
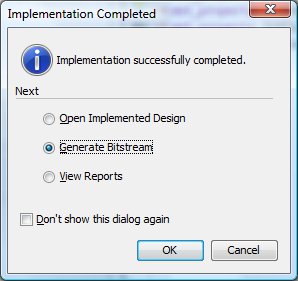
Bitstream generation
When the implementation phase ends you can generate the Bitstream i.e. the configuration file for the FPGA.
The configuration file is called HelloWorld.bit (it is placed in the folder HelloWorld\HelloWorld.runs\impl_1).
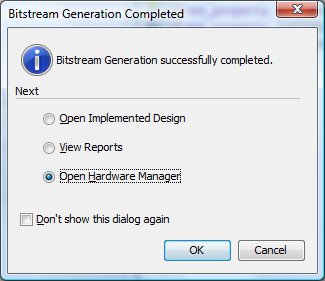
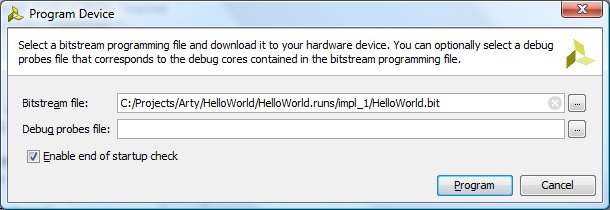
Programming the FPGA
After the configuration bitstream is generated we can open the Hardware Manager to program the hardware.
Assuming the Arty has been connected to the PC with an USB cable we can select “Open Target” and then “Program Device”. Just specify the Bitstream file.
We’re done! Pressing one of the buttons BTN0-3 will light up the corresponding led LD4-7.
Some final notes
Instead of setting the port properties you can also download an Arty master constraint file from the Digilent site:
https://reference.digilentinc.com/_media/arty_master.zip
Then add this file as the constraint file and uncomment and edit the push button and led ports.
##LEDs

set_property -dict { PACKAGE_PIN H5    IOSTANDARD LVCMOS33 } [get_ports { led_4bits[0] }]; #IO_L24N_T3_35 Sch=led[4]
set_property -dict { PACKAGE_PIN J5    IOSTANDARD LVCMOS33 } [get_ports { led_4bits[1] }]; #IO_25_35 Sch=led[5]
set_property -dict { PACKAGE_PIN T9    IOSTANDARD LVCMOS33 } [get_ports { led_4bits[2] }]; #IO_L24P_T3_A01_D17_14 Sch=led[6]
set_property -dict { PACKAGE_PIN T10   IOSTANDARD LVCMOS33 } [get_ports { led_4bits[3] }]; #IO_L24N_T3_A00_D16_14 Sch=led[7]

##Buttons

set_property -dict { PACKAGE_PIN D9    IOSTANDARD LVCMOS33 } [get_ports { push_buttons_4bits[0] }]; #IO_L6N_T0_VREF_16 Sch=btn[0]
set_property -dict { PACKAGE_PIN C9    IOSTANDARD LVCMOS33 } [get_ports { push_buttons_4bits[1] }]; #IO_L11P_T1_SRCC_16 Sch=btn[1]
set_property -dict { PACKAGE_PIN B9    IOSTANDARD LVCMOS33 } [get_ports { push_buttons_4bits[2] }]; #IO_L11N_T1_SRCC_16 Sch=btn[2]
set_property -dict { PACKAGE_PIN B8    IOSTANDARD LVCMOS33 } [get_ports { push_buttons_4bits[3] }]; #IO_L12P_T1_MRCC_16 Sch=btn[3]
Here is also a local copy of the master constraint file in case the digilent link stops working.
Hi… I just bought an Arty board (it came with a Voucher for a Vivado locked to my board)… I tried following your example but I got stuck at the moment of Selecting the Part/Board when creating the project… In my case I do not get the option to select the Arty board… I only get the “Artix-7 Evaluation Platform” and some other boards but not the ARTY…
Do you know how could I include this board in the Vivado environment?
Thanks
Hi! I think all you need to do is to install the board definition file. You can download the the board package from the Digilent site: https://reference.digilentinc.com/_media/vivado:board_files_09252015.zip
And then extract the arty folder and put it into the Vivado board repository in C:\Xilinx\Vivado\2015.2\data\boards\board_files. For more information please take a look at my previous post http://eb.dy.fi/2015/11/installing-vivado-for-arty/.
You also have to restart Vivado after you copy the arty directory to the board_files directory, otherwise the arty board will not show up in the dialog box.
Thanks EB! Your posts are easy to follow and very informative.
Just got HelloWorld working on my Arty within minutes!
Great Job, wonderful so complete and accurate information.
I am sure people are benefiting from this blog in a big way.
Thank you so much 🙂
Cheers